2 Git
2.1 What is Git?
Git is a version control system for tracking changes in computer files and coordinating work on those files amongst multiple people. Git is a Distributed Version Control System, so Git does not necessarily rely on a central server to store all the versions of a project’s files. Instead, every user ‘clones’ a copy of a repository (a collection of files, a folder) (the remote repository) and has the full history of the project on their own hard drive (one’s local repository). This clone has all of the data of the original while the original itself is stored on a self-hosted server or a third party hosting service like GitHub1.
2.2 What is version control?
Version control is a system that records changes to a file or set of files over time. It allows you to revert files back to a previous state, revert the entire project back to a previous state, review changes made over time, see who last modified something that might be causing a problem, who introduced an issue and when, and more1.
Also refer to the Git presentation from DSA1, WS2024.
2.3 How to install Git
First, check if Git is already installed on your computer. Click on the name of your operating system below and follow the steps shown:
► Windows
- open the application Command Prompt
- type or paste the command below and press enter
git --version
► MacOS
- open the application Terminal
- type or paste the command below and press enter
git --version
► Linux
- open the application terminal
- type or paste the command below and press enter
git --version
Inspect the output: if it looks anything like
git version 2.40.0
, Git is already installed on your computer. Skip the instructions below and move on to the next step, setting up GitHub.
If Git is not installed, follow these steps:
► Windows
install Git from here, open it, and follow the instructions► MacOS
- open the application Terminal
- type or paste the command below and press enter; it will install Homebrew, a package manager
/bin/bash -c "$(curl -fsSL https://raw.githubusercontent.com/Homebrew/install/HEAD/install.sh)" - type or paste the command below and press enter
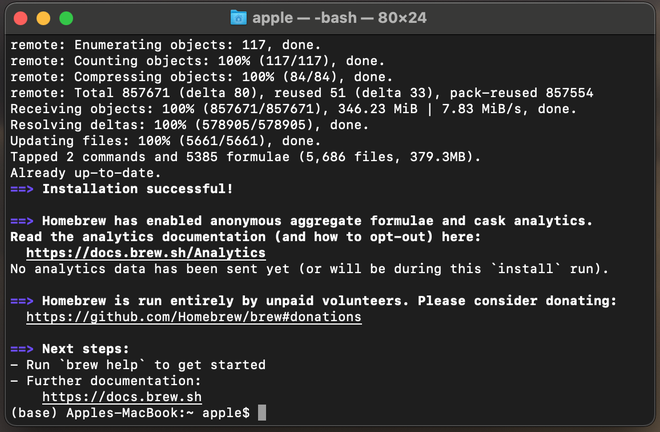
brew install git
 [^2]
[^2]
► Linux
use your package manager's installation command, e.g.sudo apt install gitAlso refer to the instructions here.
Double-check if Git was installed successfully by running
git --version
as described above. On Windows, you might want to use the application Git BASH that came with your Git installation (instead of Command Prompt).
3 GitHub
3.1 What is GitHub?
GitHub is a platform that allows you to create, store, manage and share code in the form of repositories. It uses Git2.
3.2 What is a lab?
A lab is a programming assignment. You will receive a lab every Thursday, 2PM which you must complete until Friday, 2PM. Exceptions may occur due to e.g. national holidays.
3.3 How are we going to use Git and GitHub?
We will post the labs on GitHub which you can access via invitation links that we will send you. When you open such a link, a personalised repository/instance of the lab will be generated for you. You will be cloning this repository to your computer, making changes to the provided code or uploading new code, and sending the changes to the remote repository on GitHub. Do not forget about the last step as the tutors cannot see any changes you make to the repository on your computer.
3.4 Setting up Git & GitHub
3.4.1 Create GitHub account
Go to GitHub and create an account.
Please send your GitHub username, your real name, and your matriculation number to the email address javalab [at] sfs.uni-tuebingen [dot] de.
3.4.2 Set account identity
Before you can upload or push changes to any remote repositories (i.e. the repositories stored on GitHub), you must first configure your name and email with Git on your computer.
Do this by opening the command line/terminal/console and entering (copying and pasting) the commands below, replacing ‘FirstName LastName’ with your first and last name and ‘your@email.address’ with the email address you used to sign up for GitHub. Use double quotation marks as shown below.. You only need to do this once.
git config --global user.name "FirstName LastName"
git config --global user.email "your@email.address"
3.4.3 Set up an SSH key
Generally, the SSH (secure shell) protocol is used to connect and authenticate to remote servers and services. With SSH keys, you can connect to GitHub without supplying your username and personal access token at each visit. This facilitates accessing and writing data in repositories on GitHub3.
To set up an SSH key, follow the instructions below.
- Generate the key by entering the command below in the terminal, replacing ‘your@email.address’ with the email address associated with your GitHub account.
ssh-keygen -t rsa -b 4096 -C "your@email.address"
You will be prompted to enter the path to the file in which you want to save the key — just hit enter and let it get saved to the default location. Now enter and confirm the password you want to use. Do not forget this password.
After you confirm your password, you will be shown the following message:
‘Your identification has been saved in /aPath/.ssh/id_rsa.’
Copy this path, as you’ll need it later.
- You have to tell the computer that you want to use the SSH key you just generated. Do this by running the command below, which will start the ssh-agent.
eval $(ssh-agent -s)
- Next, add the SSH key you generated to the agent. Use the path you copied in step 1, like so:
ssh-add /aPath/.ssh/id_rsa
Make sure to use the correct path; otherwise, you’ll get a ‘no such file’ or directory error. Enter your passphrase when prompted.
- Copy (the public version of) the key so that you can use it on GitHub. You can do this by opening the file
id_rsa.pubstored in the location shown in the command above. You can also run the command below to display the key.
cat /aPath/.ssh/id_rsa.pub
Copy the entire output — this is your public key.
- Open GitHub, click on your profile picture, then Settings. In the navigation menu (left side), go to ‘SSH and GPG keys’. Click on the green button in the top right corner labelled ‘New SSH key’. Give the key a title (can be anything) and paste the key you just copied into the key field. Then click on the button labelled ‘Add SSH key’.
Basic Git commands
git clone
Create a copy of a remote repository on your computer by using the command below, replacing ‘yourRepoLink’ with the link to the repository you want to clone. Clone this very repository. Obtain its link by clicking on the green button labelled ‘Code’ in the upper right corner, clicking on ‘SSH’ and copying the link shown. To save the copy in a specific location on your computer, read on.
git clone yourRepoLink
To save the copy in a specific location on your computer, navigate to it using cd, which stands for change directory (change folder). E.g. if your ‘homework’ folder is inside the ‘Documents’ folder, you can use this command to go into that folder:
cd Documents/homework
git add
For most assignments, you are provided with starter code to complete and will simply need to clone, commit, and push. But sometimes, you will need to create a new file. You must explicitly tell Git about new files that it is to track. Do this by using the command below, replacing ‘yourFileName.file’ with the name of your file.
git add yourFileName.file
git commit
You must ‘save’ any changes you made to your local repository by committing them, i.e. informing Git about the changes and that they are ready to be sent to the remote repository. Additionally, provide a commit message, i.e. concise and meaningful description of the changes you made, marked by -m and the description in quotation marks. Use the command below, replacing ‘yourFileName.file’ and ‘update personal information’ with your corresponding file name and commit message. Use double quotation marks as shown below.
git commit yourFileName.file -m "update personal information"
Examples for commit messages: “populate required fields” or “add name and student ID”.
git push
Now you are ready to push the changes you made, i.e. update the remote repository. Do this using the command below.
git push
If you would like to dive deeper into Git and GitHub, we highly encourage you to explore on your own. Google is a great resource for learning more about these tools. For a solid introduction, this is a helpful link to get you started. Check out the links in the footnotes too.
Done. Move on to the next step, installing VSCode, by using the menu on the left or returning to the top of this page and clicking on the arrow on the right.